Front Fork Spring, Fluid & Gaiter Replacement
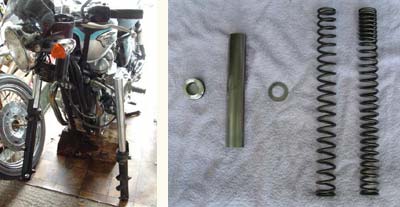
A relatively common gripe about the Hinckley Bonneville is the sponginess of the suspension. This can be rectified easily at the rear by replacing the shock absorbers with a pair of Ohlins, Koni, Ikon or similar after-market ones - there are plenty out there to choose from. I fitted a pair of Hagon Nitros and, now that I've got the pre-load and dampener settings correct, I'm pretty happy with them. However, replacing the front springs and fluid in order to reduce oscillation in cornering and fork-dive is a little bit more of a task. Again, there are several springs to choose from, though I'd strongly recommend a progressive type - where the coils are more closely wound at one end to increase the spring rate as the forks compress. I used Hagon Progressive springs (part no. 400-088-11) with SAE20 fluid for a good firm ride.
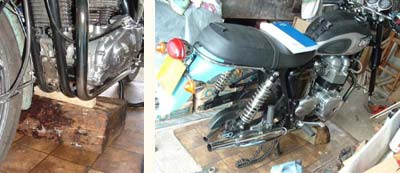
The first thing you need to do is put your bike on its centre stand and lift the front end of the bike to place a good solid 7 to 8 inches (175 to 200mm) high by 10 inches (250mm) wide block under it so that the front wheel is lifted up off the ground [below left]. With this arrangement, it is also possible to remove both wheels together if required [below right].
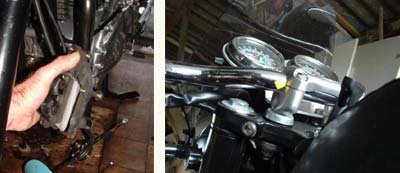
Remove the front wheel, speedo drive, brake callipers and mud guard - it is not necessary to disconnect the brake hose. Fit a 3 or 4mm spacer between the brake pads to prevent unnecessary hassle should the brake lever get pulled inadvertently [below left] and tie it up out of the way - somewhere near the oil cooler should be fine. Remove the handlebars if it looks like you might need to push the stanchions downwards from above. It might be helpful to mark their position to save time later when reassembling [below right].
Before removing the forks, I recommend loosening the end caps at the top of both stanchions slightly to save unnecessary effort later on. This done, loosen the 8mm allan clamp screws on the top and bottom yokes on one side only - best to work on one fork at a time, otherwise refitting them into the yokes can be tricky.
Slide the fork downwards and out of the yokes being careful not to disturb the tube on which the headlamp is mounted [right]. With the fork free, the stock stanchion protector plate can be removed to make room for the gaiter - best done by carefully tapping it upwards with a hammer and a small piece of hardwood by degrees around its circumference. The stanchion end cap can then be removed - expect it to be under pressure from the spring inside. Lift out the spacer and washer with a clean tent peg or similar.
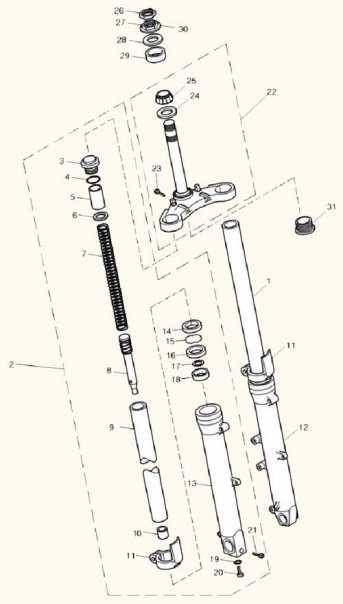
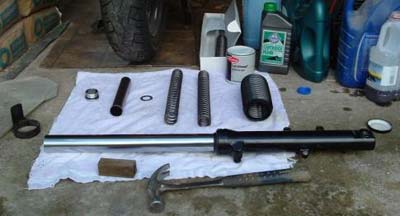
The internal component parts of the forks in order of removal [right] are: stanchion top cap; spacer; washer; spring (330 X 35mm). The spring on the far right is the replacement progressive spring (Hagon) - which should be inserted with the tighter coils uppermost to minimize unsprung weight.
Pour the old fork fluid into a container before inverting the fork over a wide bowl and pumping the stanchion in and out of the slider several times. It's best to leave the fork up-side-down over the bowl for a few minutes to drain properly whilst cleaning up the cap, spacer and washer.
Compress the fork to its lowest position and pour in the new fluid to just about 150mm off the top of the stanchion. Then pump the stanchion up and down in the slider twenty or thirty times to ensure there are no air bubbles trapped in the gubbins at the base of the slider. Again with the fork fully compressed, add a little more fluid into the stanchion to bring it to exactly 150mm below the top.
The new spring can then slide into the fork with the tighter coils uppermost, followed by the washer (which is easily positioned flat on the top of the spring using the other end of the tent peg or similar "pokey thing") and then the spacer. Depending on which make of spring you choose, the spacer may need to be cut down - though in the case of the Hagon springs, no such adjustment is necessary.
The stanchion cap can now be refitted. I found that the easiest way to fit the top cap back in place was to press down on it steadily with a socket whilst rotating the stanchion to thread around it (to prevent crossing the thread, it may be best to first rotate the stanchion as though to loosen it until you hear/feel the threads click into one another and then tighten them) until well hand-tight. At this point, clean any excess fluid off the fork.
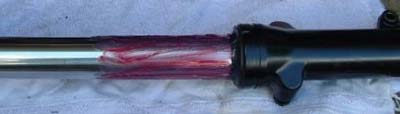
Before fitting the gaiter, apply a rubber compatible grease to the area of stanchion over which the gaiter is to be placed [above]. It is worth noting that, with normal grease, the rubber can absorb some of the chemicals from it which causes the rubber to swell and become brittle over time, leading to a breakdown of the seal. The rubber compatible grease is specially formulated to provide protection against corrosion and lubrication around the rubber seals found on pneumatic and hydraulic components such as pressurised air hose couplings and lift ram and suspension or fork seals. It is inadvisable to use any other type of grease for such applications.
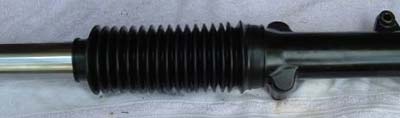
Simply slide the new gaiter over and down the stanchion [above], fitting the wider end over the part of the fork slider previously occupied by the protector plate ring, pushing the end as far down towards the mudguard mounts as it will go (you might need to secure the gaiter with a tie or a jubilee clip, but I think this is best done after both forks are back in position in the yokes).
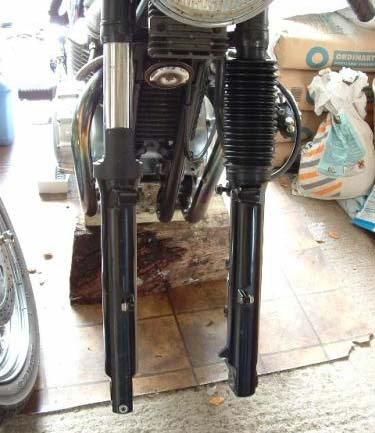
The fork can now be fitted back into the yokes, again taking care not to dislodge the tube between them. With the yoke clamps secured, tighten the stanchion top cap the rest of the way up to the recommended torque of 23Nm.
Et voila, Bob's your uncle - you can now repeat the process with the other fork.
With the caps and yokes tightened to their recommended torques [see below] refit the front wheel, speedo drive, mudguard, brake calliper, handlebars, etc.
Before going out on the road, the alignment of the front wheel and forks will need to be re-established. A quick method for doing this is to place the bike facing a solid wall (absolutely upright and head on with the handle bars dead straight and the front tyre touching the wall) having loosened only the two lower yoke stanchion clamps, mud guard/brace nuts and wheel spindle. Sit astride the bike and pump the front end downwards firmly against the wall several times without touching the brake. Very carefully reach forward and, without disturbing the bike, tighten the yoke clamps up again. Gently dismount and retighten the spindle then mud guard/brace nuts.